Environment: Visual Studio#
In the Visual Studio environment option for setting up FLINT.example, the options to run, develop and debug the repository code are available. Also make sure you have the following prerequisites setup.
Prerequisites#
Forked and cloned FLINT core repository
Forked and cloned FLINT.example repository
Now that you have all the necessary prerequisites, you can proceed with the Installation.
Using vcpkg to install required libraries#
Start cmd in the Vcpkg repository folder (that you had
cloned earlier) and use the following commands:
# bootstrap
bootstrap-vcpkg.bat

# install packages
vcpkg.exe install boost-test:x64-windows boost-program-options:x64-windows boost-log:x64-windows turtle:x64-windows zipper:x64-windows poco:x64-windows libpq:x64-windows gdal:x64-windows sqlite3:x64-windows boost-ublas:x64-windows fmt:x64-windows libpqxx:x64-windows
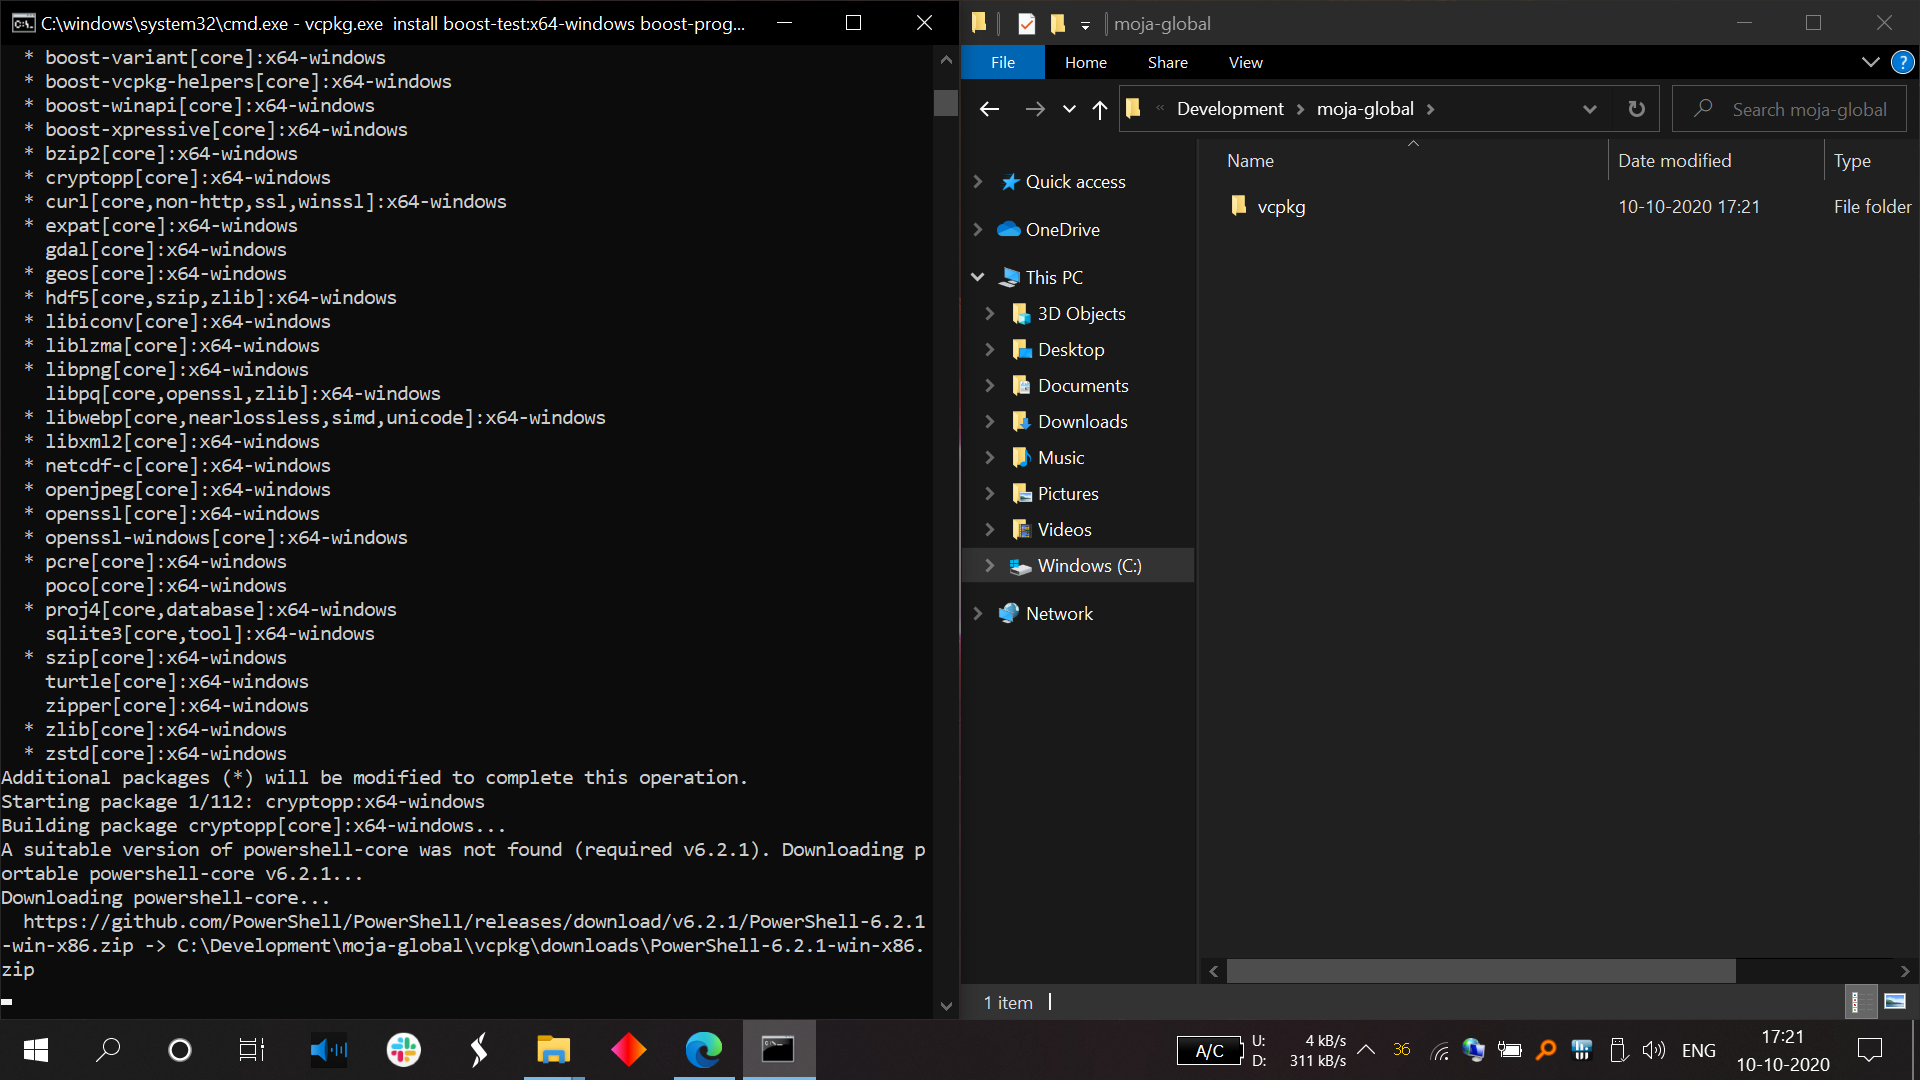
Install required packages using vcpkg in cmd.#
Building the project#
Launch cmd and run the following commands:
# Create a build folder under the Source folder
cd Source
mkdir build
cd build
Now depending on which type of simulation you want to execute, you may run one of the following generate commands:
Commands to run cmake for the point simulations:
# Point simulations
# Generate the project files
cmake -G "Visual Studio 16 2019" -DCMAKE_INSTALL_PREFIX=C:\Development\Software\moja -DVCPKG_TARGET_TRIPLET=x64-windows -DOPENSSL_ROOT_DIR=c:\Development\moja-global\vcpkg\installed\x64-windows -DENABLE_TESTS=OFF -DCMAKE_TOOLCHAIN_FILE=c:\Development\moja-global\vcpkg\scripts\buildsystems\vcpkg.cmake ..
Commands to run cmake for the spatial simulations:
# Spatial simulations
# if your planning to run spatial chapman richards example you also need to enable the gdal module
# Generate the project files
cmake -G "Visual Studio 16 2019" -DCMAKE_INSTALL_PREFIX=C:\Development\Software\moja -DVCPKG_TARGET_TRIPLET=x64-windows -DOPENSSL_ROOT_DIR=c:\Development\moja-global\vcpkg\installed\x64-windows -DENABLE_TESTS=OFF -DENABLE_MOJA.MODULES.GDAL=ON -DCMAKE_TOOLCHAIN_FILE=c:\Development\moja-global\vcpkg\scripts\buildsystems\vcpkg.cmake ..
Running the project#
In order to run and debug the Visual Studio solution -
Open the visual studio solution that CMake created at
C:\Development\moja-global\FLINT\Source\build\moja.slnBuild the debug configuration
ALL_BUILDtarget by right-clicking theALL_BUILDnode and selectingBuild.
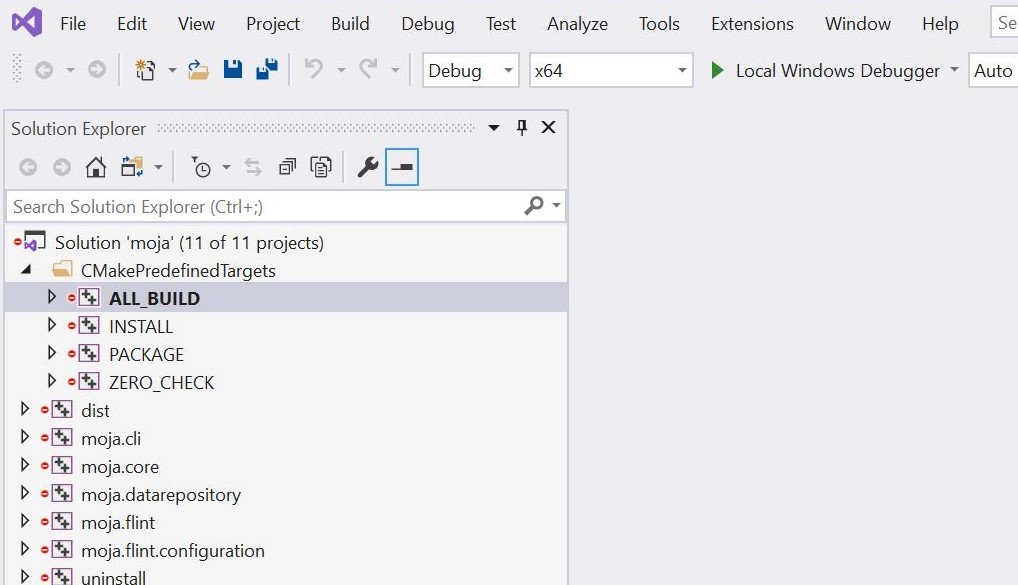
Navigating to Visual Studio Debugging ALL_BUILD properties page#
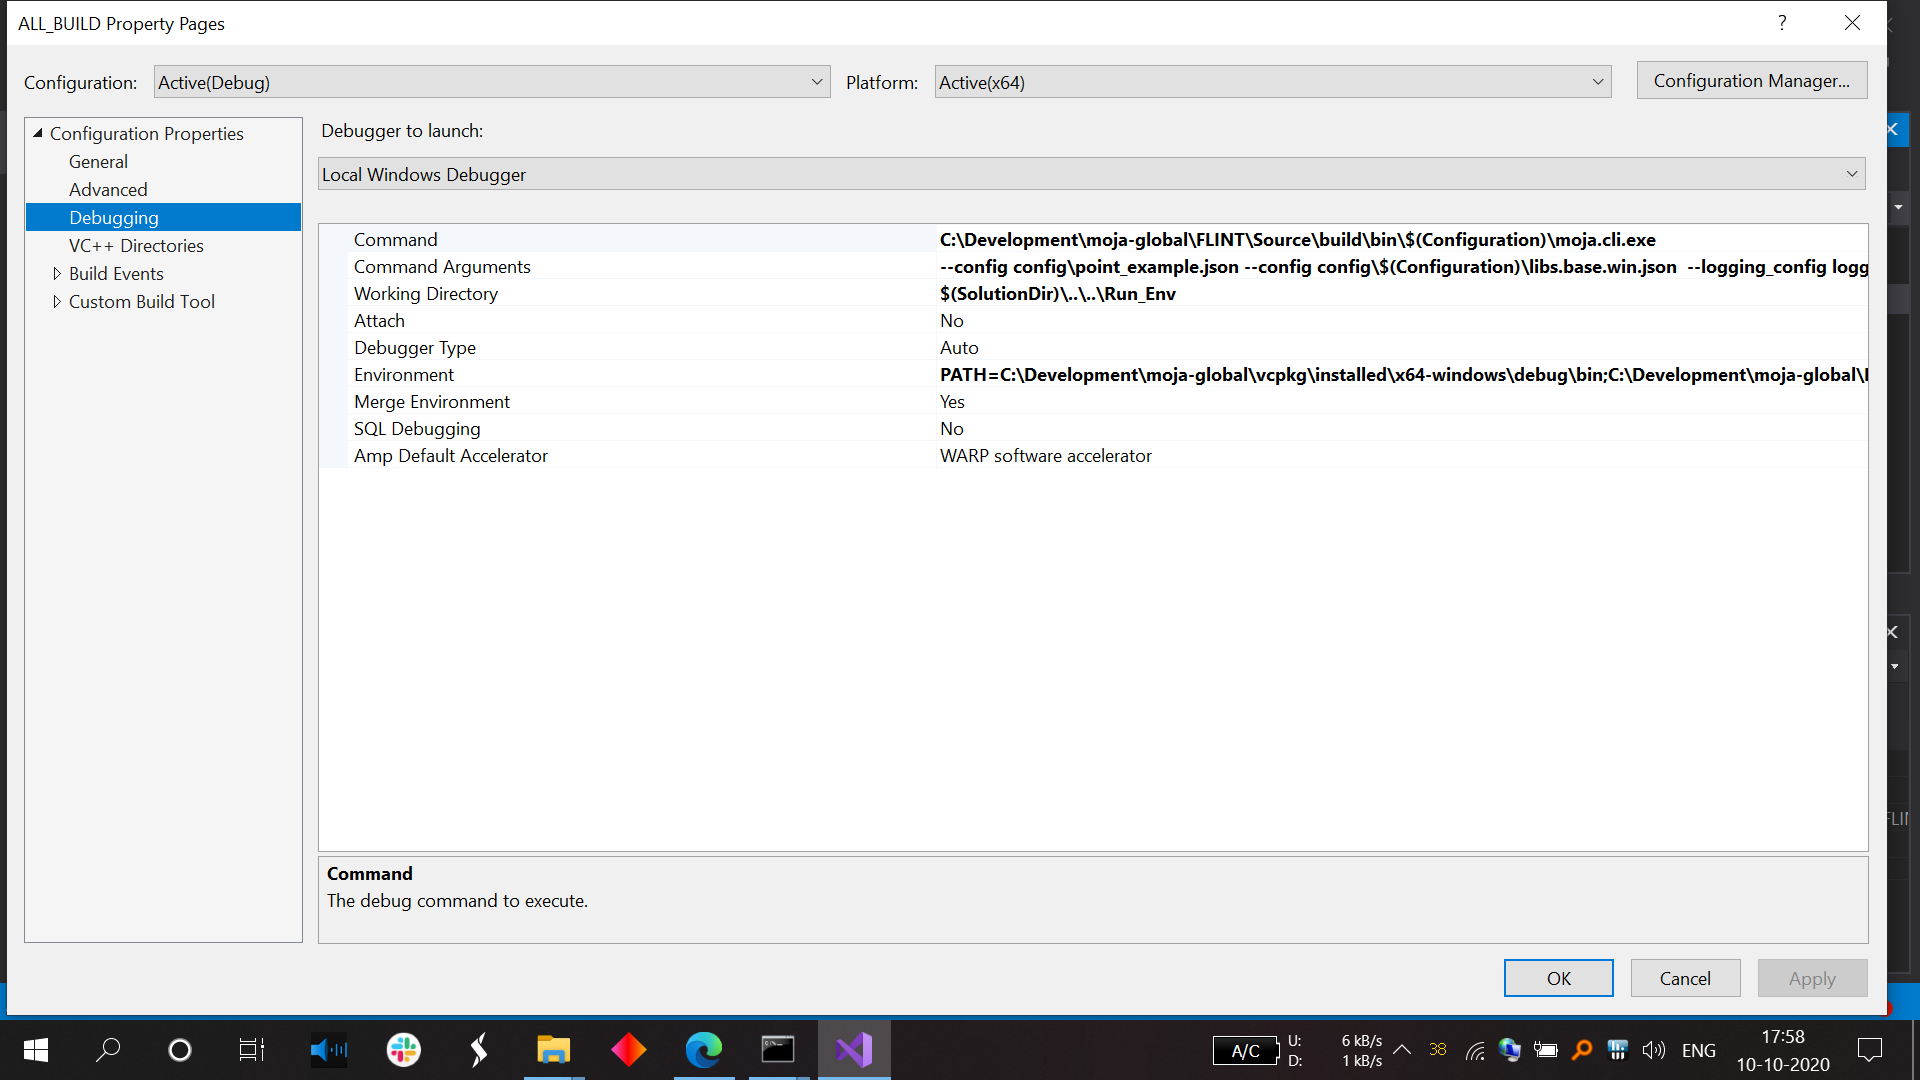
Running moja.cli.exe in Visual Studio Debugging All properties page#
Running in the IDE and debugging is a little tricky. This could more than likely be resolved with better cmake setups. But for now, there is some setup that can make running and debugging work.
The issue is we want to run with the moja.cli.exe from the
moja.FLINT project, but debug in our current IDE (FLINT.example).
The solution is to use properties to set up a Debug run in the IDE,
making the command run moja.cli.exe.
NOTE: All paths used below with C:\Development\moja-global will
need to be modified to match your system build location of the moja
project.
Test Module Example#
The settings required in VS2019 are:
# Command
C:\Development\moja-global\FLINT\Source\build\bin\$(Configuration)\moja.cli.exe

# Command Args
--config config\point_example.json --config config\$(Configuration)\libs.base.win.json  --logging_config logging.debug_on.conf

# Working Directory
$(SolutionDir)\..\..\Run_Env

# Environment Debug
PATH=C:\Development\moja-global\vcpkg\installed\x64-windows\debug\bin;C:\Development\moja-global\FLINT\Source\build\bin\$(Configuration);%PATH%
LOCAL_LIBS=$(OutDir)
MOJA_LIBS=C:\Development\moja-global\FLINT\Source\build\bin\$(Configuration)

# Environment Release
PATH=C:\Development\moja-global\vcpkg\installed\x64-windows\bin;C:\Development\moja-global\FLINT\Source\build\bin\$(Configuration);%PATH%
LOCAL_LIBS=$(OutDir)
MOJA_LIBS=C:\Development\moja-global\FLINT\Source\build\bin\$(Configuration)
With Envs: PATH for various libraries built in the Moja stage
and LOCAL_LIBS so we can modify the explicit path for our example
config to load libraries from this vs build (the default is the same
location as the EXE).
To match this, the example point config uses an environment variable in the library path:
{
  "Libraries": {
    "moja.flint.example.base": {
      "library": "moja.flint.example.based.dll",
      "path": "%LOCAL_LIBS%",
      "type": "external"
    }
  }
}
RothC example#
We also have a RothC example for point level simulations. Inorder to run this example, you may modify the following arguments in the above test settings command arguments. These arguments will point at the right configuration files for RothC. Please follow the following steps to set the correct configuration -
Build the debug configuration
ALL_BUILDtarget by right clicking theALL_BUILDnode and selectingBuild. Then right click the themoja.flint.example.rothcnode and selectSet as Startup Projectthen right click again and select properties. Navigate to ConfigurationProperties/Debuggingproperties pane and configure the following:Command:
C:\Development\moja-global\FLINT\Source\build\bin\Debug\moja.cli.exeCommand Arguments:
--config config\point_rothc_example.json --config config\debug\libs.base_rothc.win.json --logging_config logging.debug_on.conf
Working Directory:
$(SolutionDir)..\..\Run_EnvEnvironment: :
PATH=C:\Development\moja-global\vcpkg\installed\x64-windows\debug\bin;C:\Development\moja-global\FLINT\Source\build\bin\$(Configuration);%PATH%
LOCAL_LIBS=$(OutDir)
    MOJA_LIBS=C:\Development\moja-global\FLINT\Source\build\bin\$(Configuration)
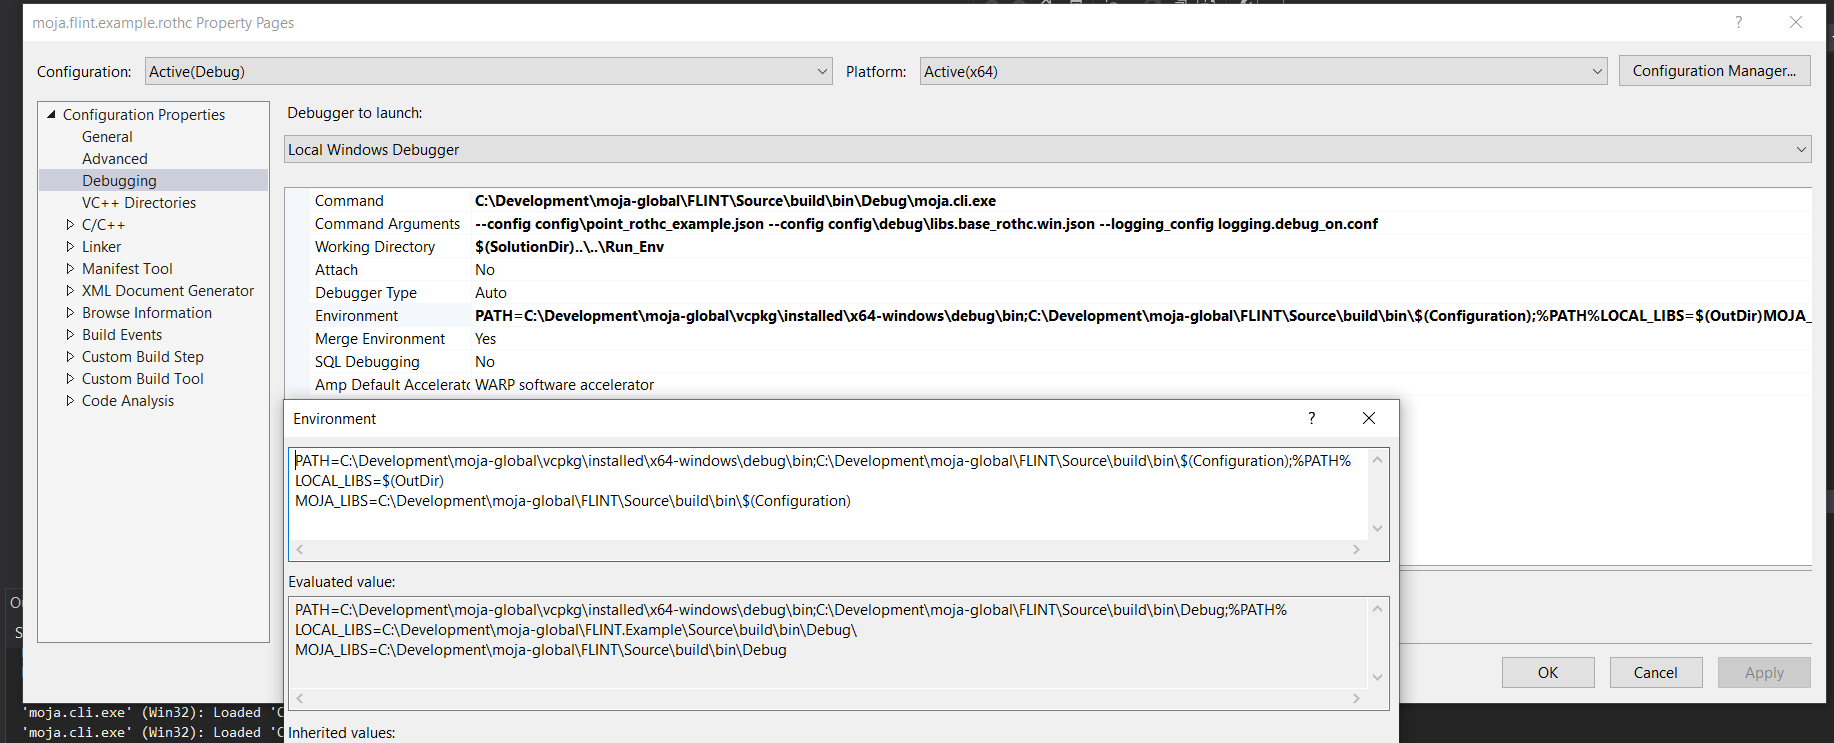
ALL_BUILD properties page for moja.FLINT.example.rothc#
You should now be able to select Debug->Start Debugging to start a
debug run of the RothC example. You should see something like the
following:
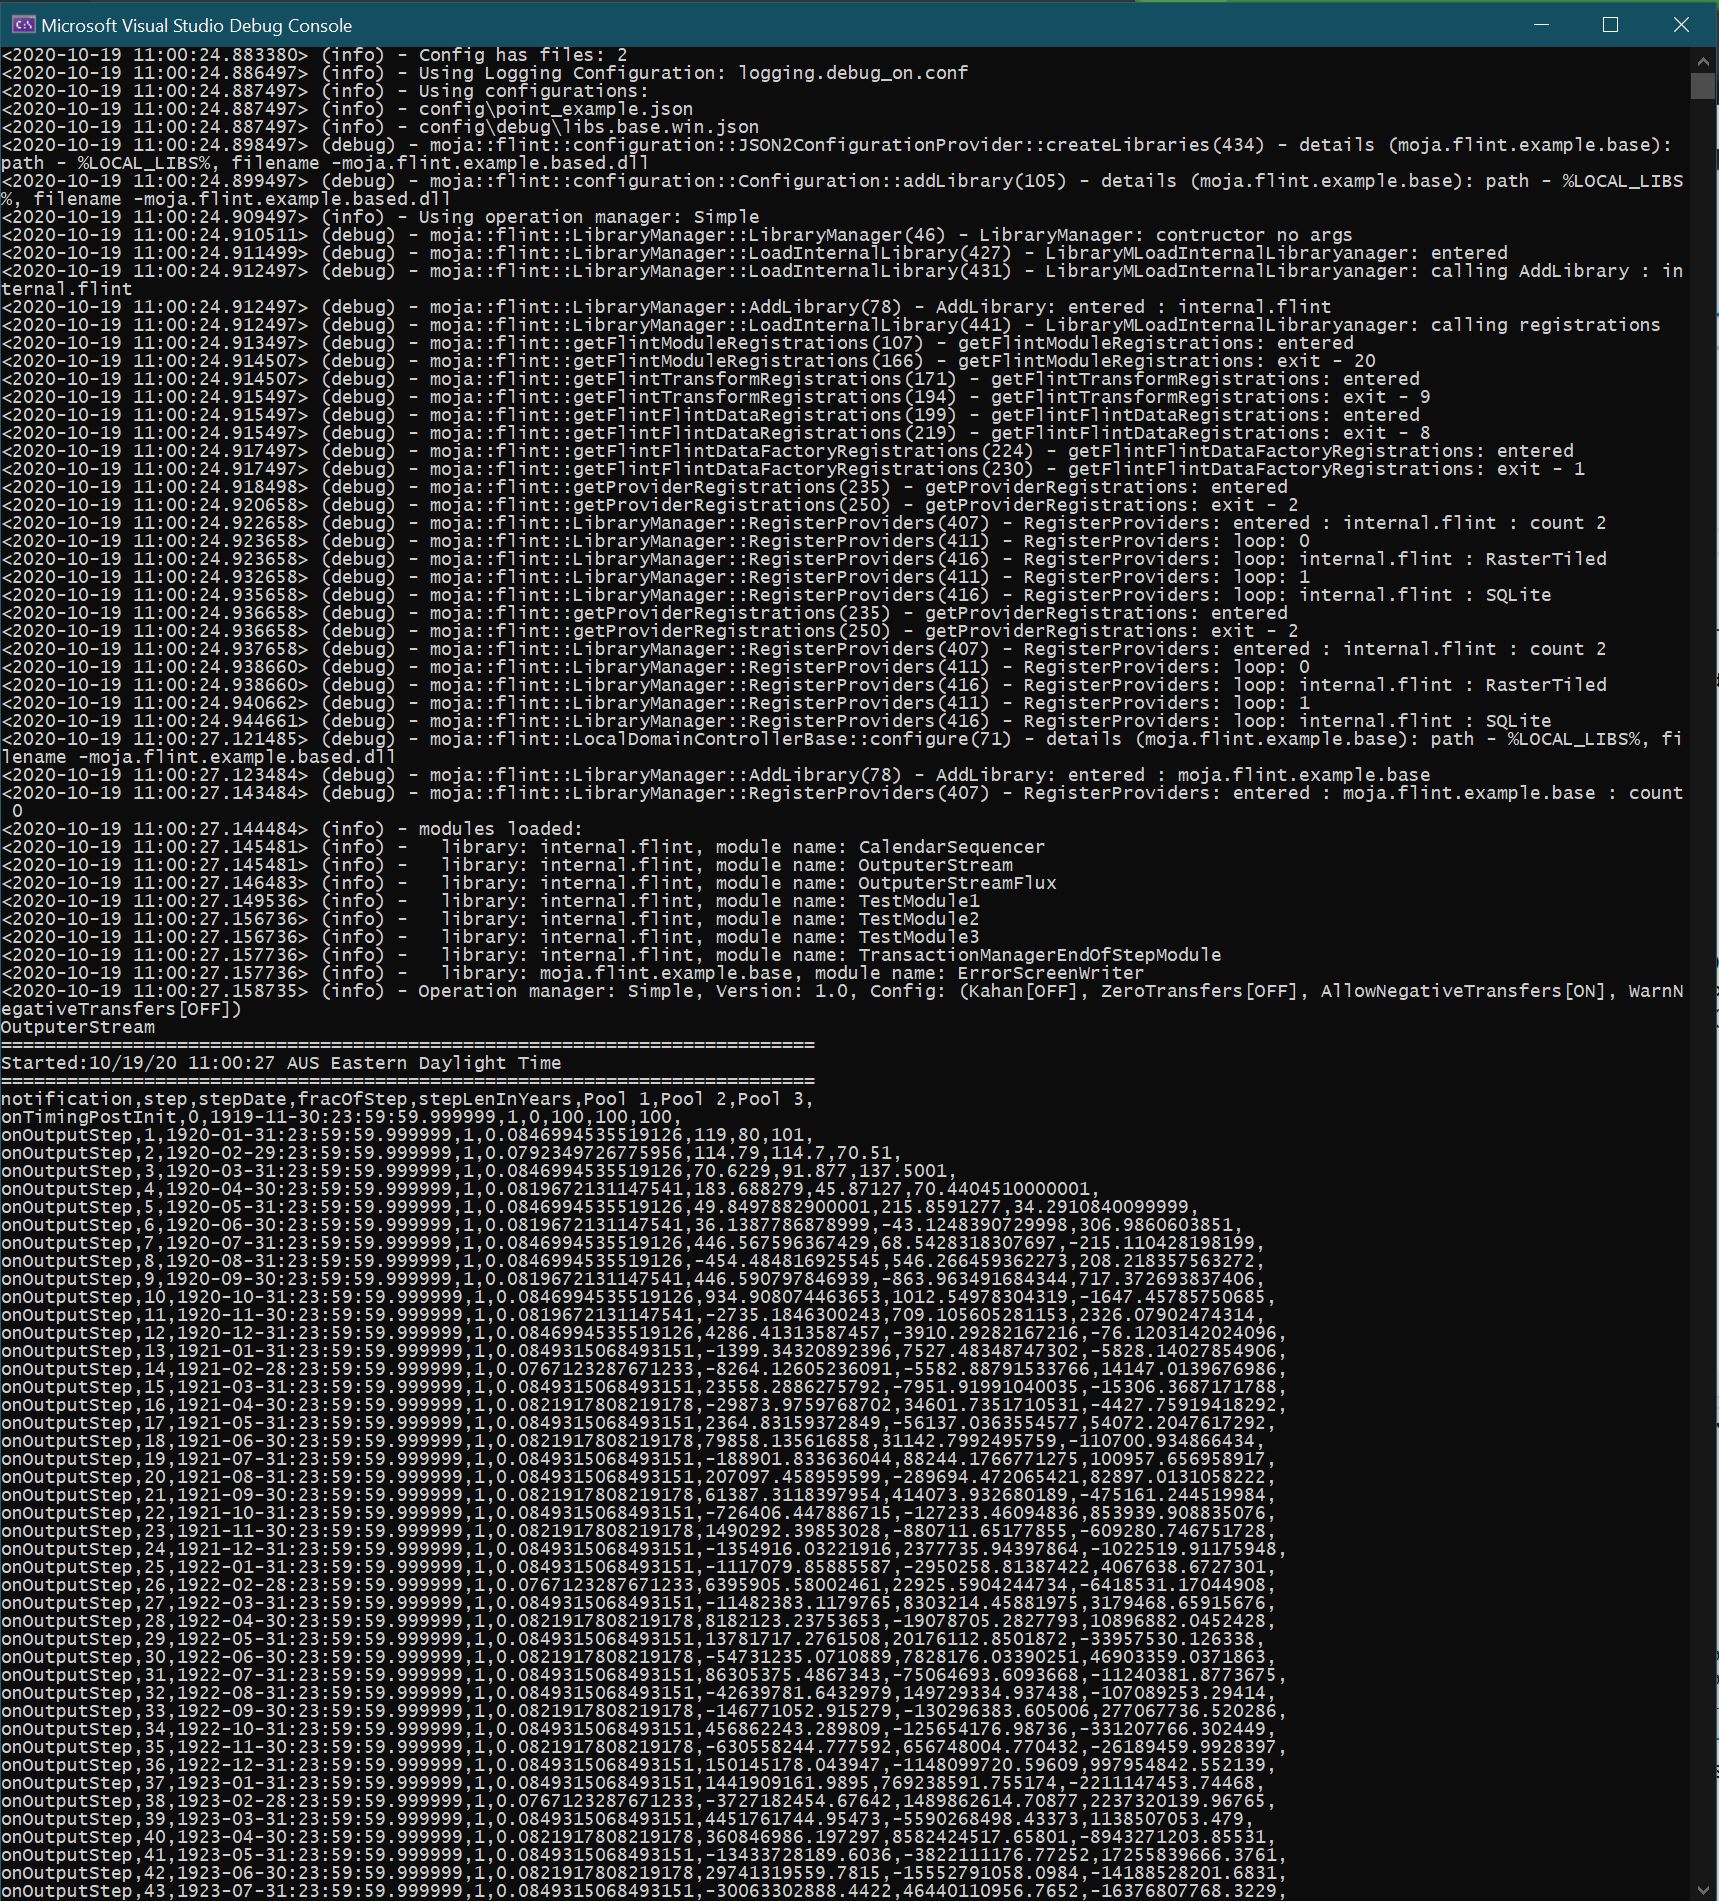
Debug run for rothc example#
RothC model video tutorial#
We also have a video tutorial dedicated to RothC model that can be followed along with the commands -
Enable moja.modules.GDAL#
Before moving on to setting up the Chapman Richards model, we need to
enable the moja.modules.GDAL flags. We can toggle these flags by
clicking on BROWSE BUILD and setting it to the build directory where
we just built the solution.
Open the solution that CMake created at
C:\Development\moja-global\FLINT\Source\build\moja.sln.
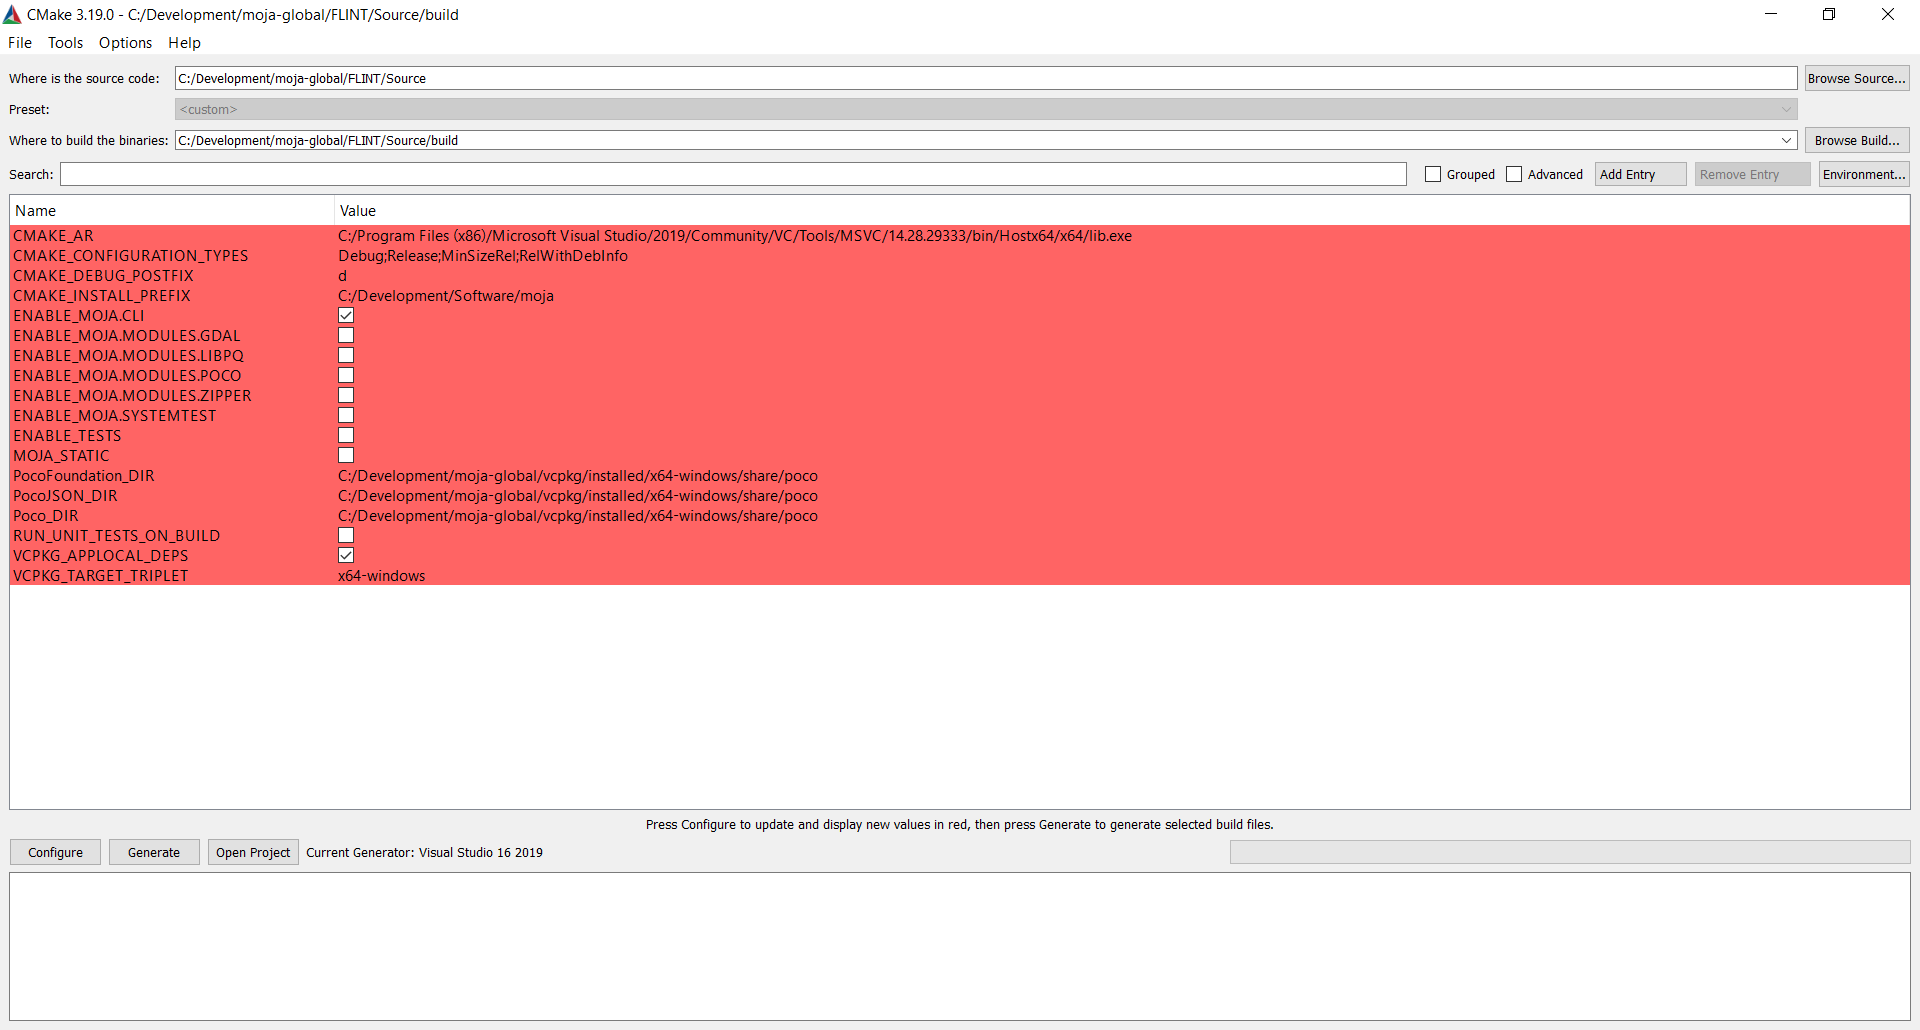
Navigating to Cmake Configuration Page#
Check the following Flags present:
ENABLE_MOJA.MODULES.GDAL
ENABLE_MOJA.MODULES.LIBPQ
ENABLE_MOJA.MODULES.POCO
ENABLE_MOJA.MODULES.ZIPPER
Checking the flags mentioned#
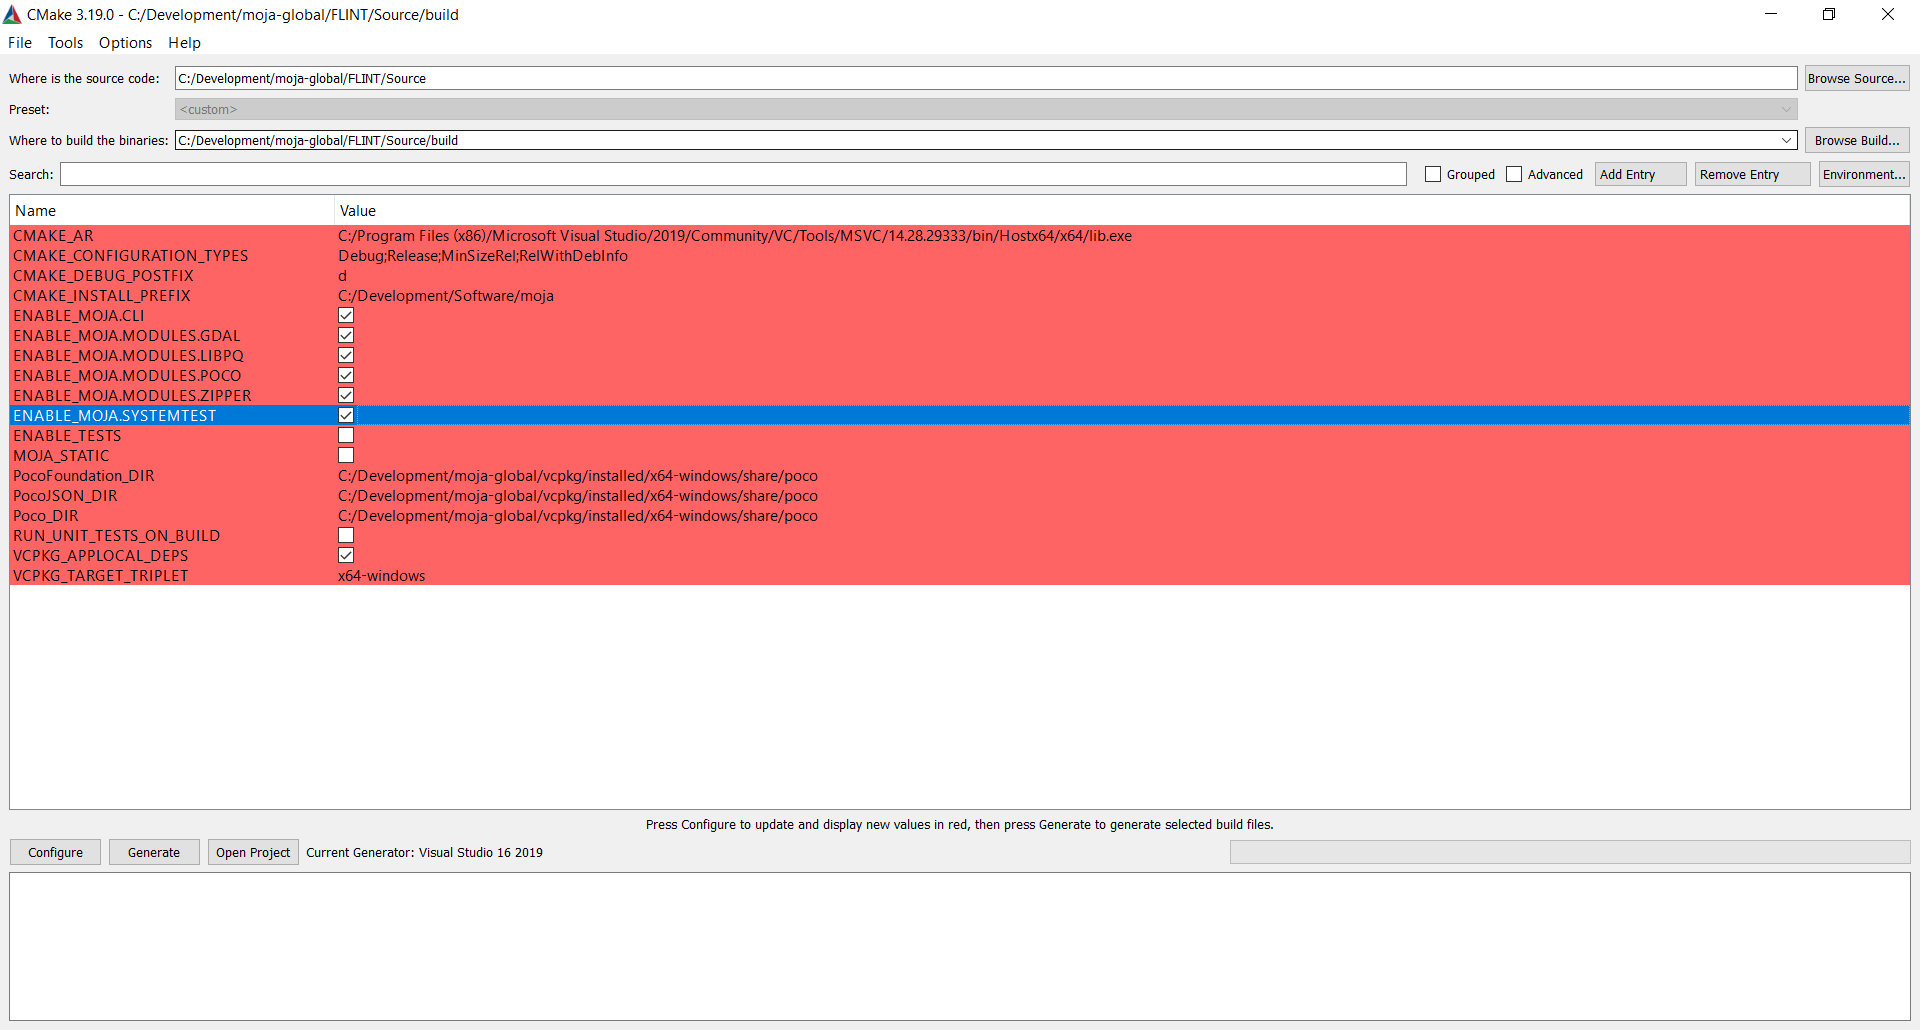
Now, Click on
Configureoption twice.
Configuring the new options highlighted in red#
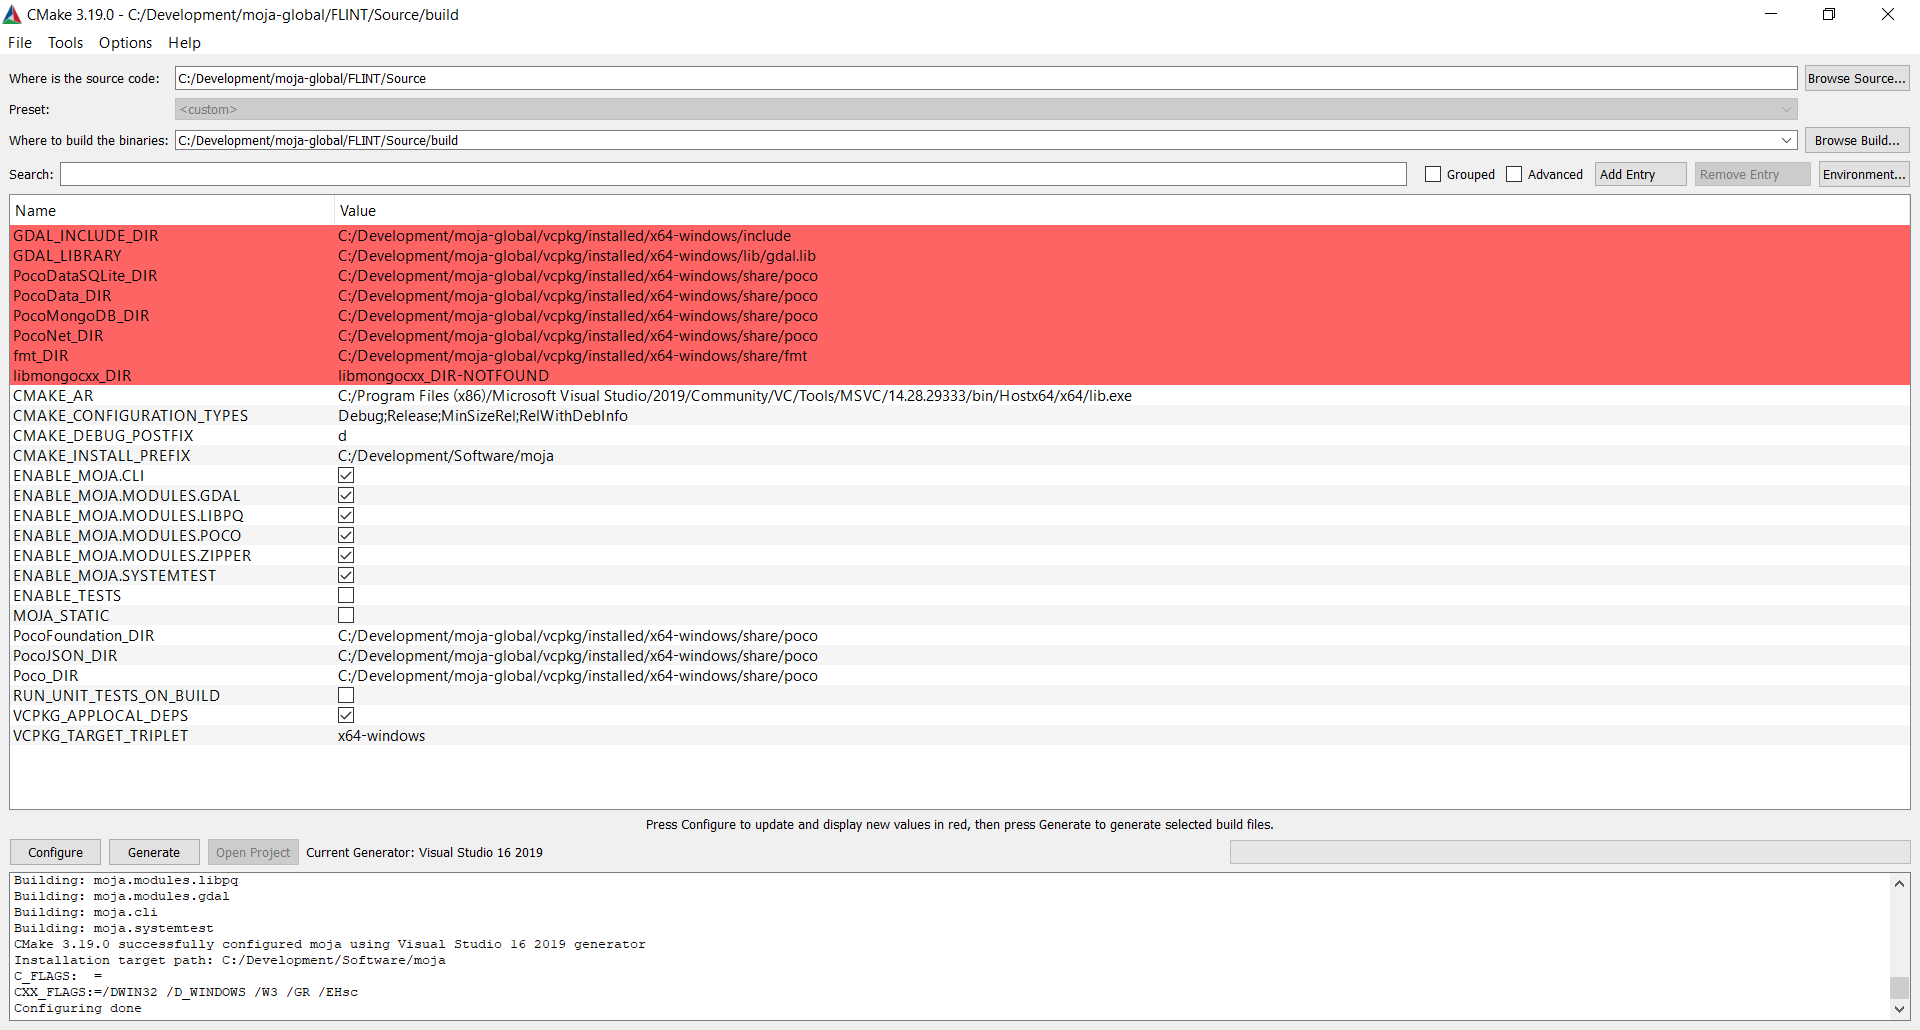
Click on
Generateand then you may explore all the enabled modules in Solution Explorer by clicking onOpen Project.
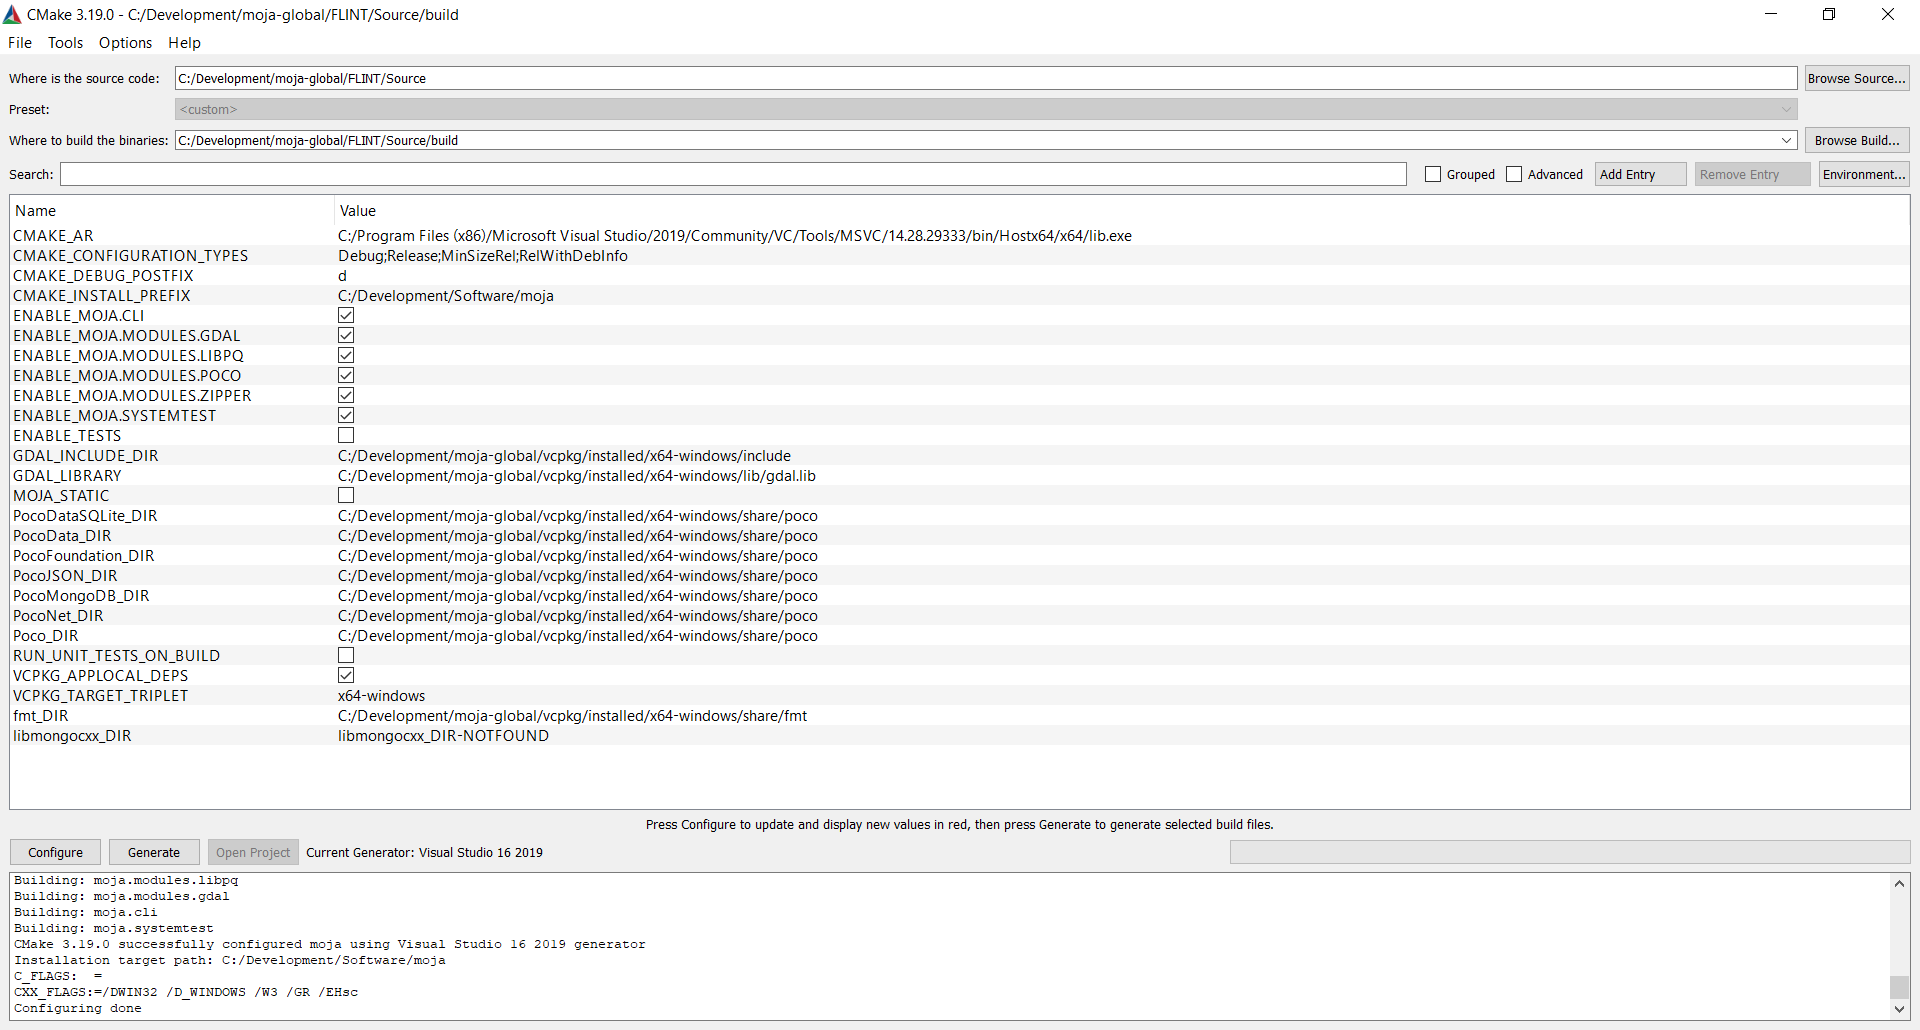
Generating the new configuration#
Open
CMakePredefinedTargets, right click onALL_BUILDand click on Build
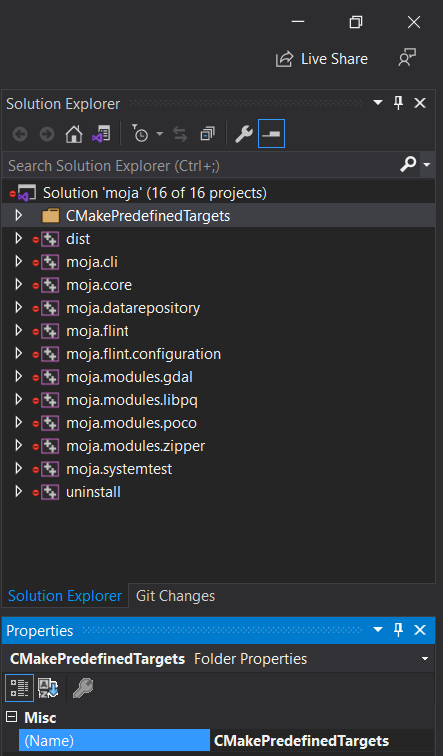
Navigate to CMakePredefinedTargets Build#
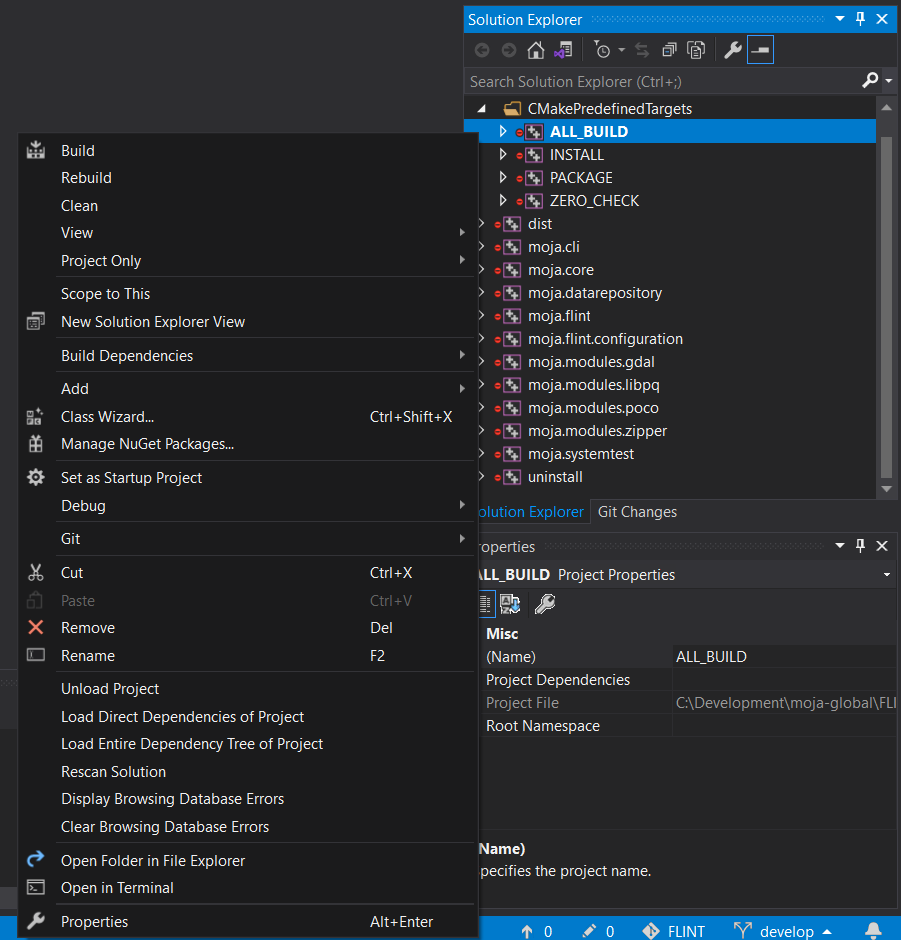
CMakePredefinedTargets ALL_BUILD Screen#
Viola! All libraries have been enabled You may now proceed with the Chapman Richards example!
Chapman Richards example#
Based on the moja global repository Chapman Richards , this sample can be run on both point and spatial versions (over Dominica). Inorder to run this example, you may modify the following arguments in the above test settings command arguments. These arguments will point at the right configuration files for Chapman Richards.
# Command Args
# Point
--config config/point_forest_config.json --config config/$(Configuration)/libs.gdal.chaprich.win.json
# Spatial
--config config/forest_config.json --config config/$(Configuration)/libs.gdal.chaprich.win.json --config_provider config/forest_provider.json
Chapman Richards model video tutorial#
We also have a video tutorial dedicated to Chapman Richards model that can be followed along with the commands.