Windows Installation
This section guides first-time contributors through installing FLINT development environment.
Before proceeding further, make sure you have setup the project using Git by following our guide Git and GitHub Guide. Also make sure you have the following prerequisites setup -
Prerequisites
Now that you have all the necessary prerequisites, you can proceed with the Installation.
Using vcpkg to install required libraries
Start a command shell in the Vcpkg repository folder (that you had cloned earlier) and use the following commands:
# bootstrap
bootstrap-vcpkg.bat

# install packages
vcpkg.exe install boost-test:x64-windows boost-program-options:x64-windows boost-log:x64-windows turtle:x64-windows zipper:x64-windows poco:x64-windows libpq:x64-windows gdal:x64-windows sqlite3:x64-windows boost-ublas:x64-windows
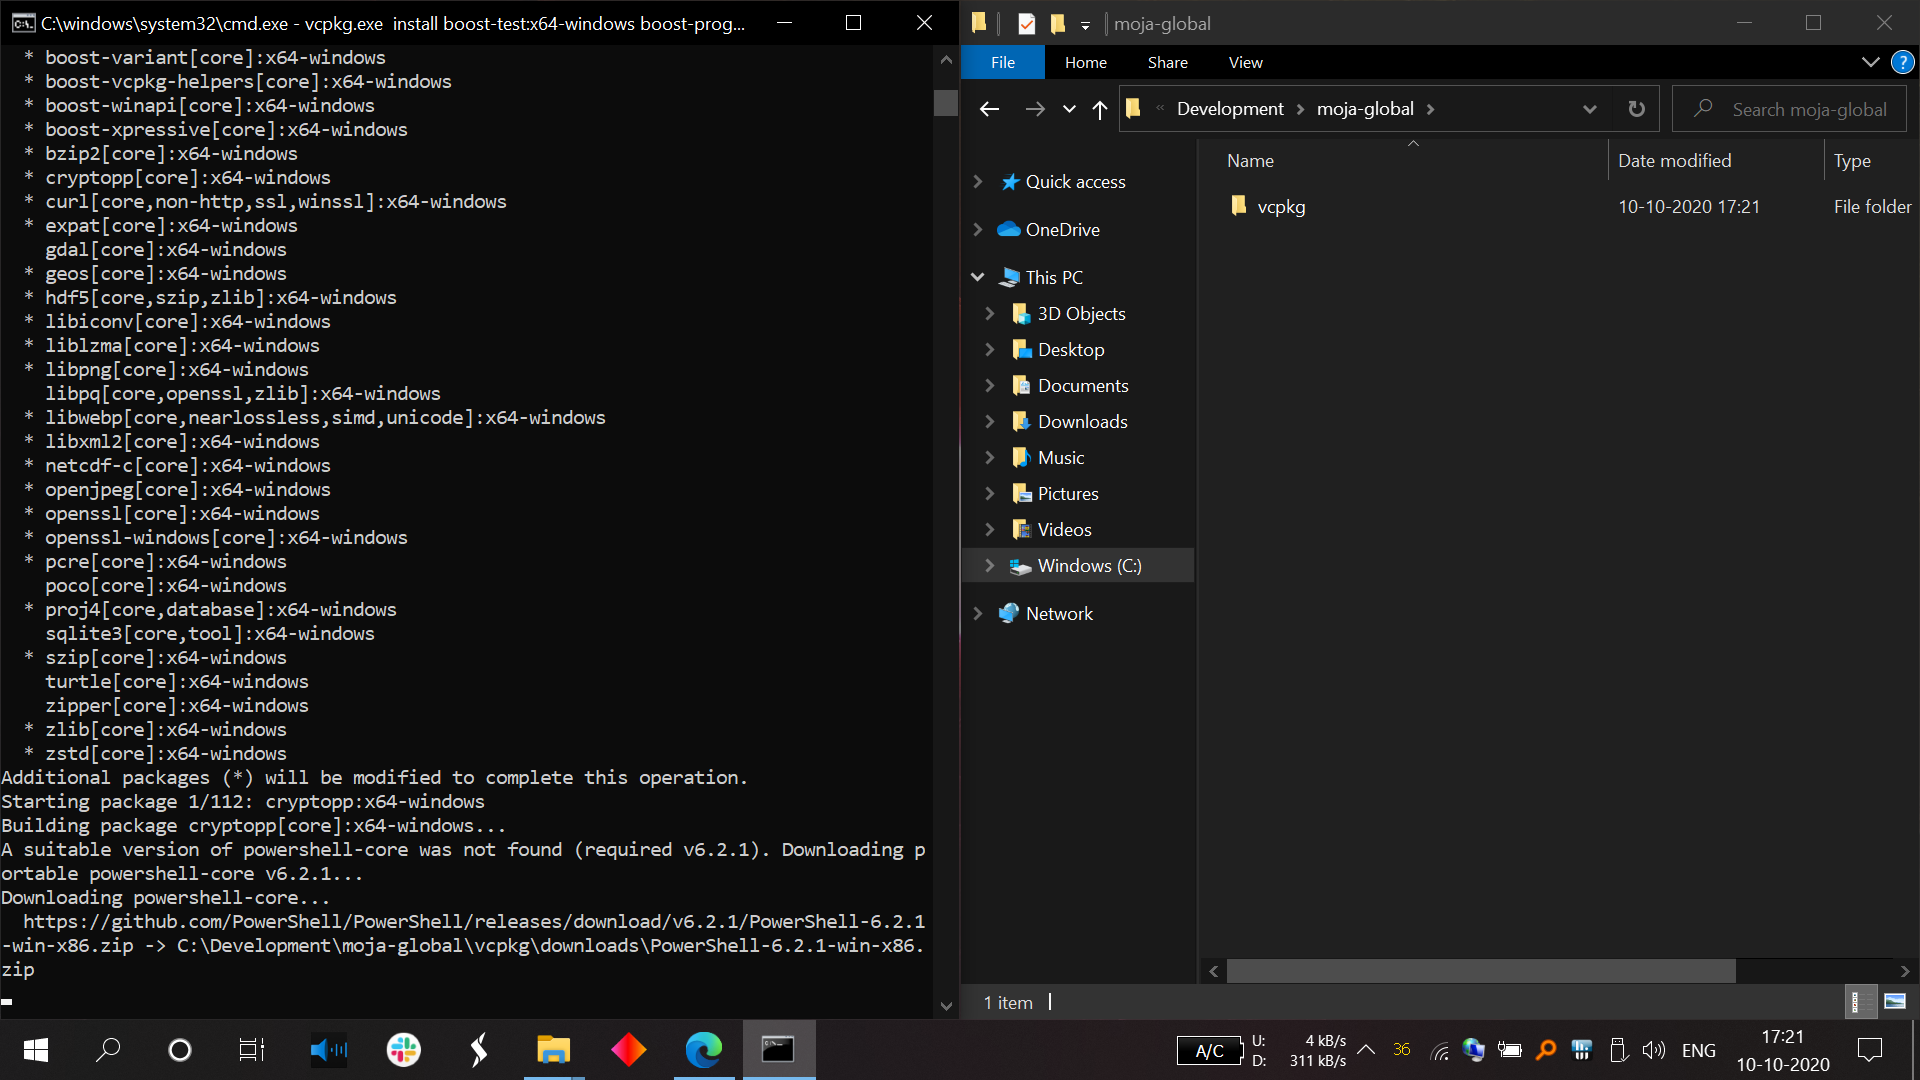
Installing required packages using vcpkg in Command Prompt
Using cmake to build the project
Note
Please make sure that you have checked out to the Develop Branch for the FLINT Installation. You may refer to our Git and GitHub Guide for instructions on how to switch to develop branch.
Once this has completed, start a command shell in your FLINT repository folder. Now use the following commands to create the Visual Studio solution:
# Create a build folder under the Source folder
cd Source
mkdir build
cd build

# from ..\moja\FLINT\source\build
# now create the Visual Studio Solution (2019)
cmake -G "Visual Studio 16 2019" -DCMAKE_INSTALL_PREFIX=..\..\.. -DVCPKG_TARGET_TRIPLET=x64-windows -DENABLE_TESTS=OFF -DENABLE_MOJA.MODULES.ZIPPER=OFF -DCMAKE_TOOLCHAIN_FILE=..\..\..\vcpkg\scripts\buildsystems\vcpkg.cmake ..

# OR Visual Studio Solution (2017)
cmake -G "Visual Studio 15 2017" -DCMAKE_INSTALL_PREFIX=..\..\.. -DVCPKG_TARGET_TRIPLET=x64-windows -DENABLE_TESTS=OFF -DENABLE_MOJA.MODULES.ZIPPER=OFF -DCMAKE_TOOLCHAIN_FILE=..\..\..\vcpkg\scripts\buildsystems\vcpkg.cmake ..
Note
All paths used below with C:\Development\moja-global will need to be modified to match your system build location of the moja project.
Running the project
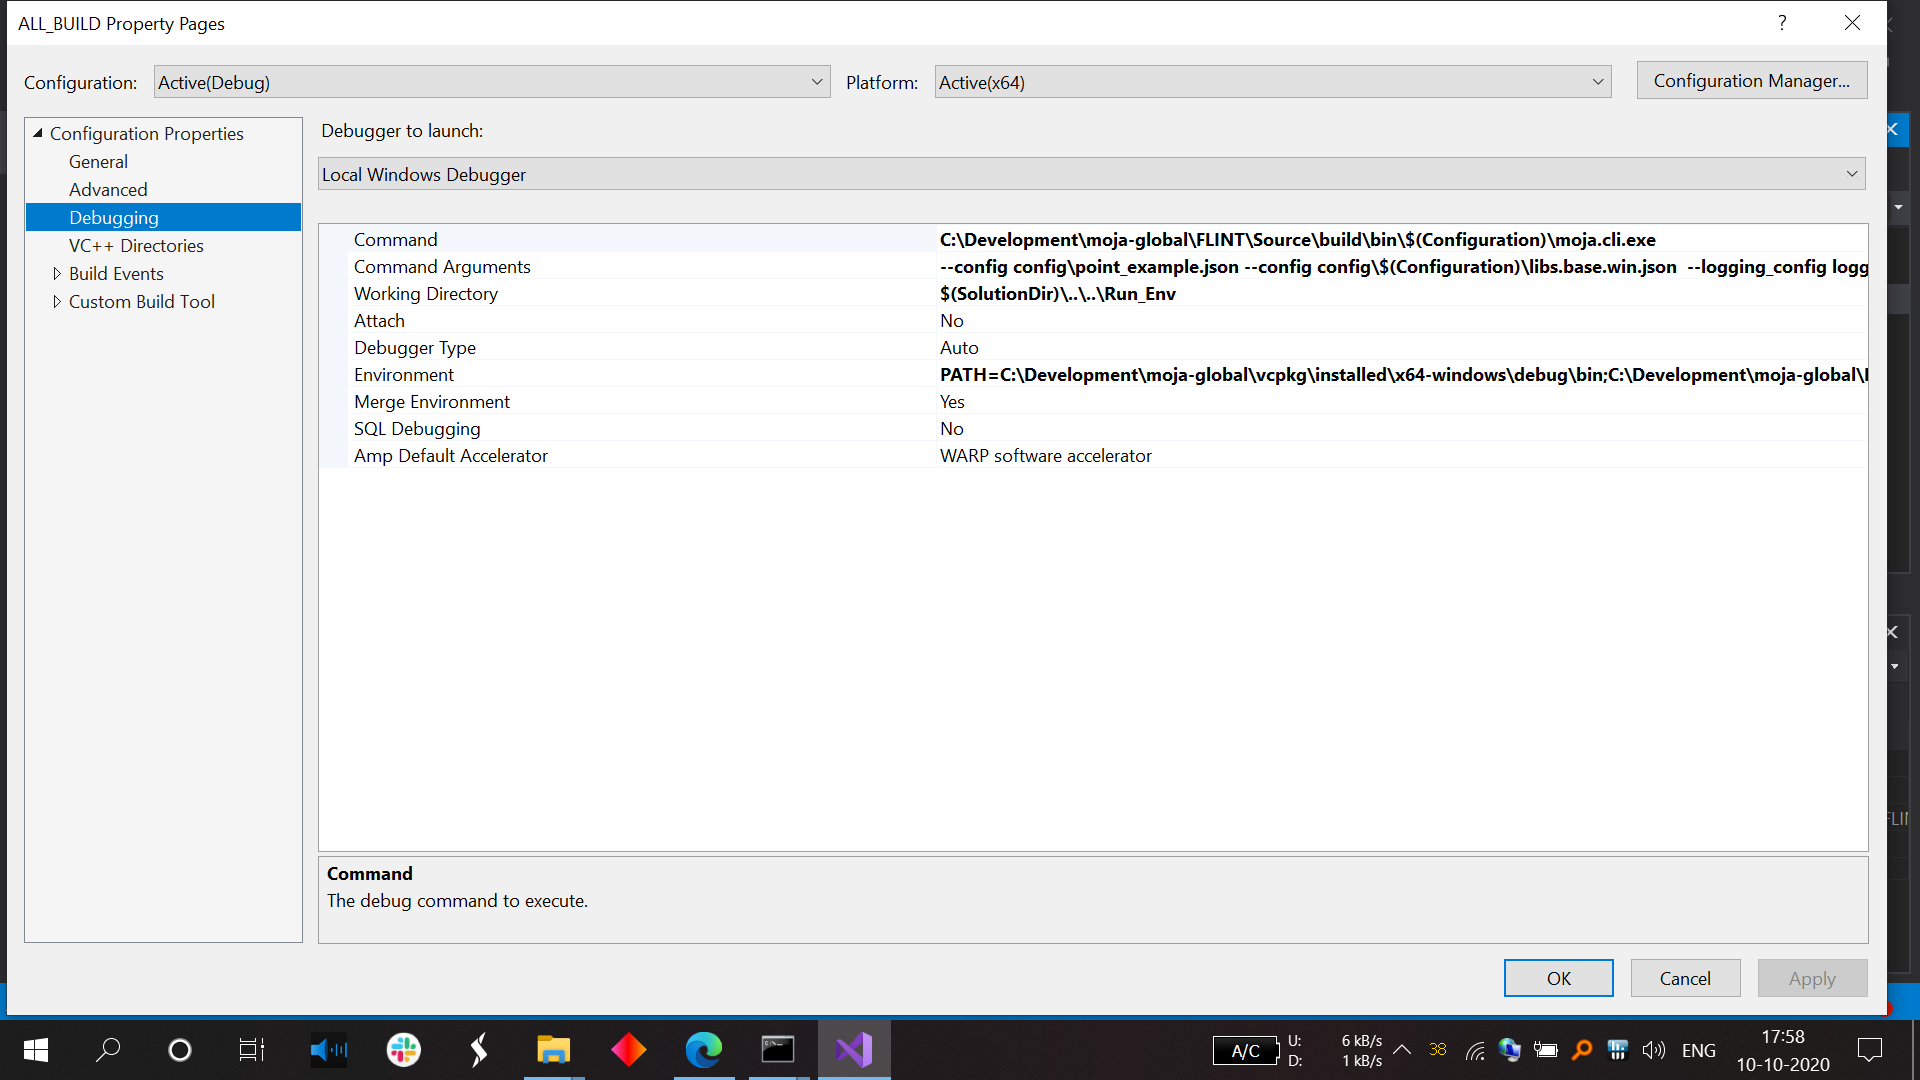
Running moja.cli.exe in Visual Studio Debugging All properties page
We are running the moja.cli.exe from the moja.FLINT project here. In order to make edits to the Visual Studio Solution we can use the CMake GUI.
Edit solution using CMake GUI
- Launch the CMake GUI
- In the
Where to build the binariesfield clickBrowse Build…and select the folder you created above (i.e.C:\Development\moja-global\FLINT\Source\build). TheWhere is the source code:field should update, if not, set it correctly. - You should be able to edit any CMake setting now (i.e. ENABLE flags like
ENABLE_TESTS), then clickConfigure– assuming all libraries and required software has been installed you should have no errors. Now clickGenerateand the Solution with adjustments should be ready to load into Visual Studio.